QR Code Ordering Flow For Table Service
Posted on |
Updated as of: June 22, 2022
Simplifying dine-in table service through QR code ordering & payments. (What to expect)
The benefits of mobile ordering & payments through a digital QR code menu:
- Operate more efficiently with less staff.
- Staff spend less time on menial tasks like bill printing & running payment terminals.
- Staff can spend more time on quality guest interactions.
- Guests spend no time waiting to order when ready.
- Increased guest cheque average.
- Turn more tables, more quickly.
1. Guests Scan Your QR Code
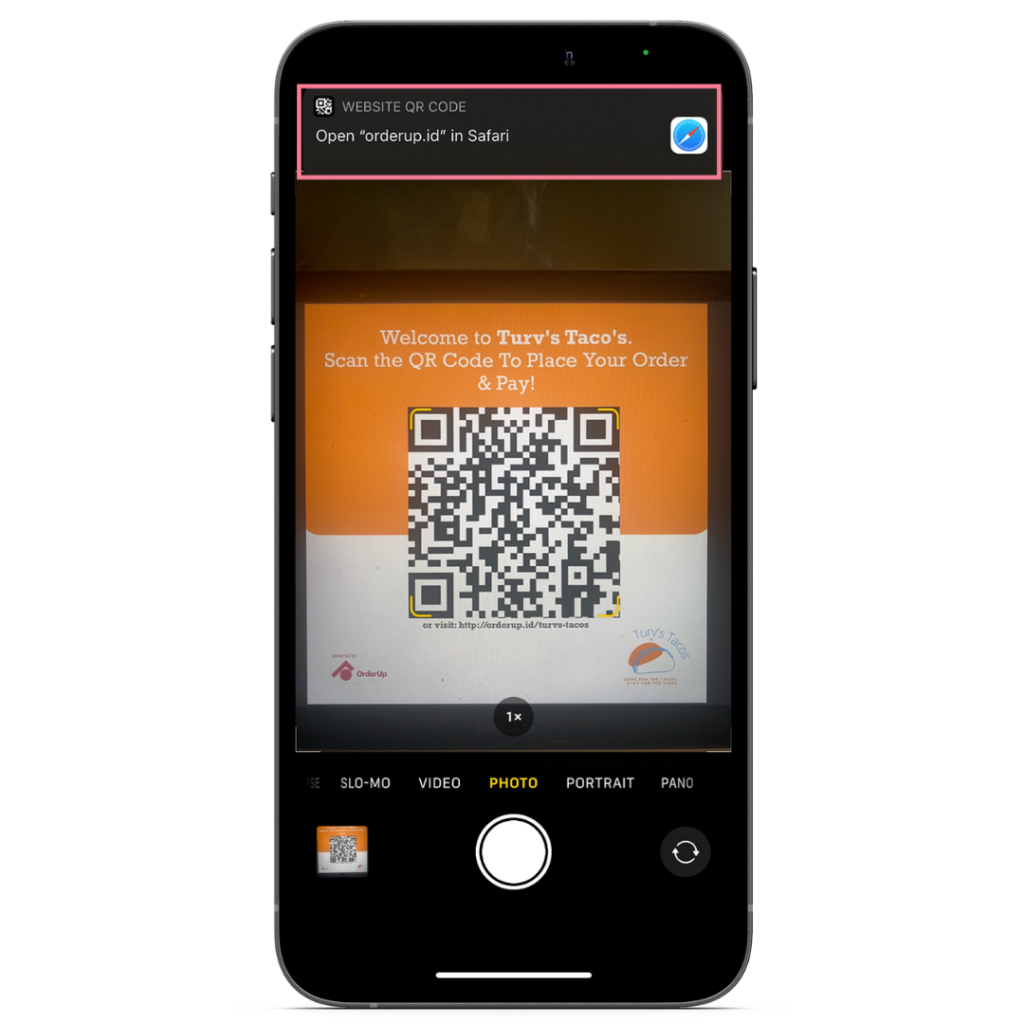
Diners open their camera, and scan a QR code located on the table.
A link will appear at the top of their phone, bringing the diner to your mobile friendly digital menu.

2. Guests Browse Your Restaurant's Menu
Our QR code menus are designed and optimized for mobile devices. This makes menu browsing seamless.
Menus can be updated in real-time through your menu builder merchant backend.
3. Select Items and Modifiers
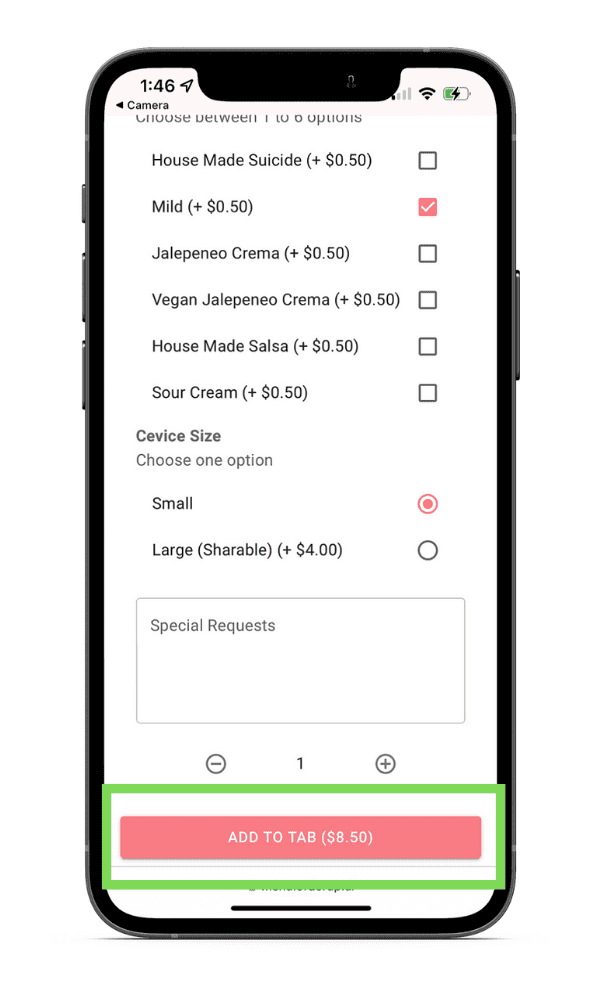
Each item can have as many, or as few modifiers as desired. These modifiers can be charged, free, optional, or required.
There’s also a comment box for any special requests or allergies to ensure every item that comes out is up to par.
Once complete, guests will add the item and modifiers to their tab.
4. Submit Tab
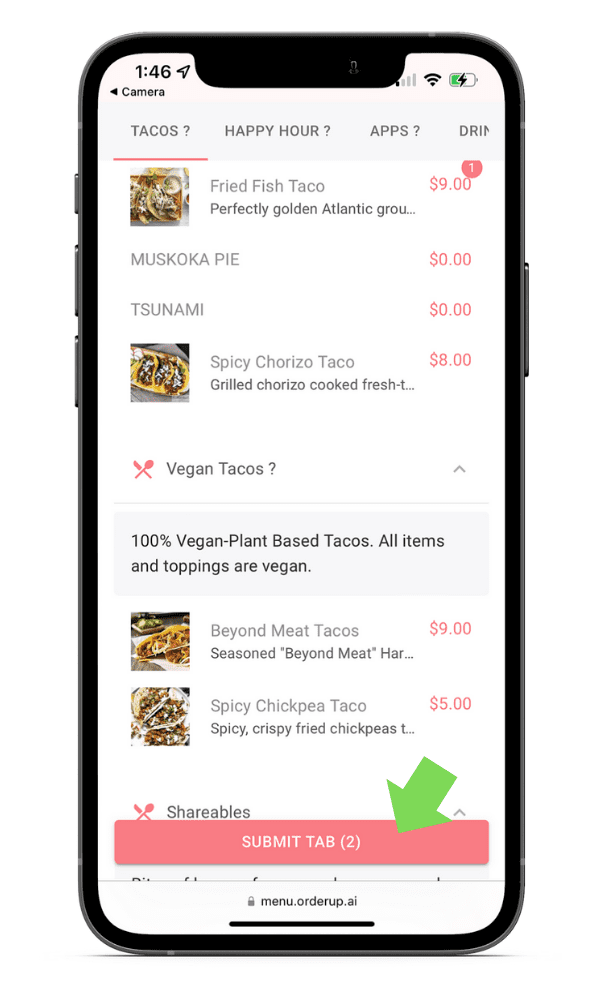
After items are added, it the tab, guests will be prompted to “Submit Tab”.
They are able to add as many or as few items as they want.
Guests will always be able to add more items throughout their dining experience.
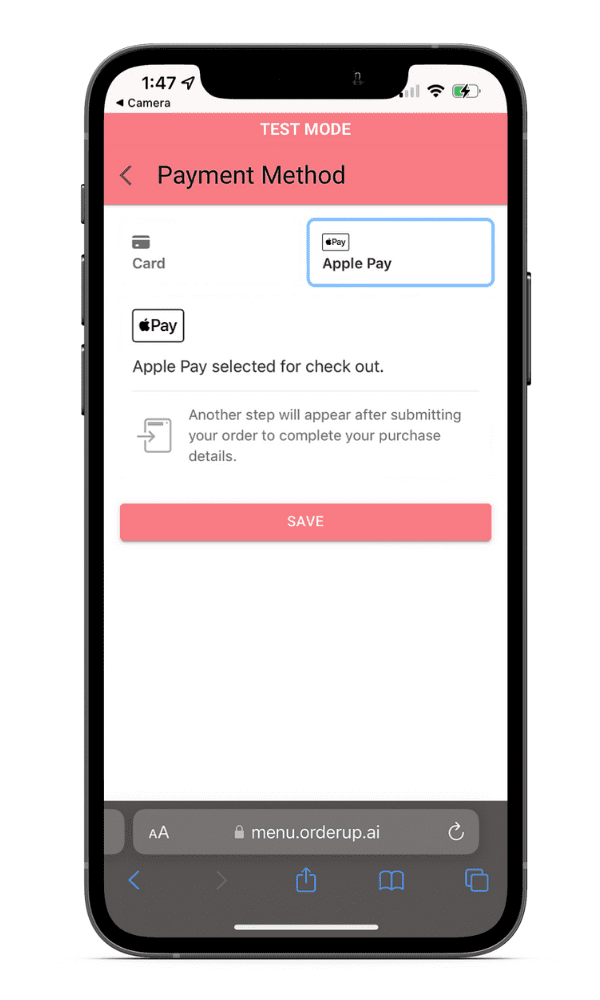
5. Add Payment Information
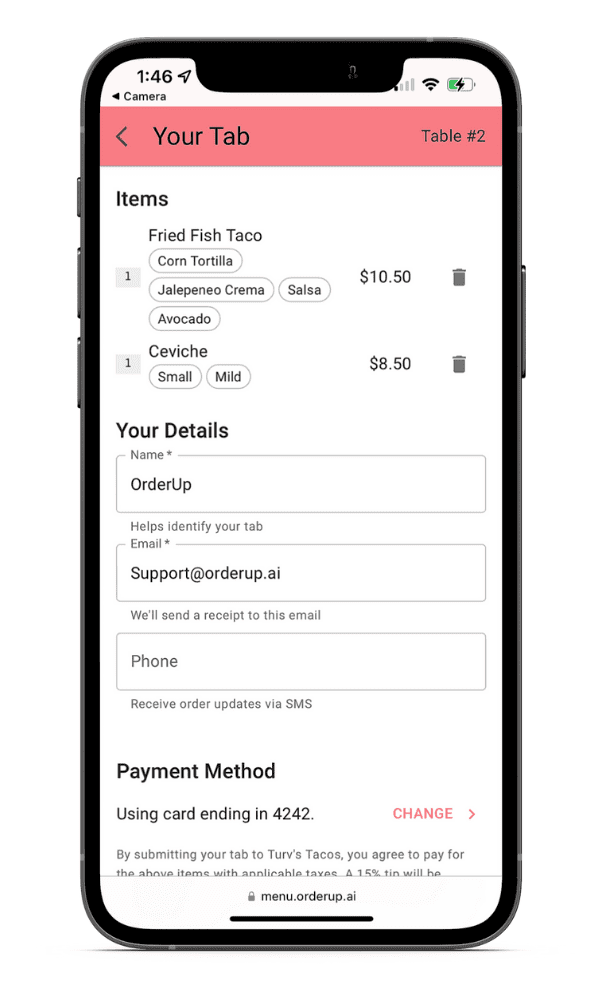
Before an order is submitted, guests must provide a valid credit card. The guest it not charged at this point.
Submitting payment information at this stage of the ordering process results in a much smoother payment process at the end of the meal.
This step also ensures that dine and dashes never happen. If a guest or table forgets to pay their bill, you’re able to charge their card at the end of the meal when closing the table.
About 85% of diners have ApplePay enabled which makes the “Adding Payment Type” take under 5 seconds.
For those without ApplePay, guests are able to scan their Credit Card and have it auto populate, or they may type in the card info manually.
The guest information (Name, Email, Phone Number) are used to identify orders and send receipts.
See below:
6. Guest Submits Tab to Kitchen & Bar
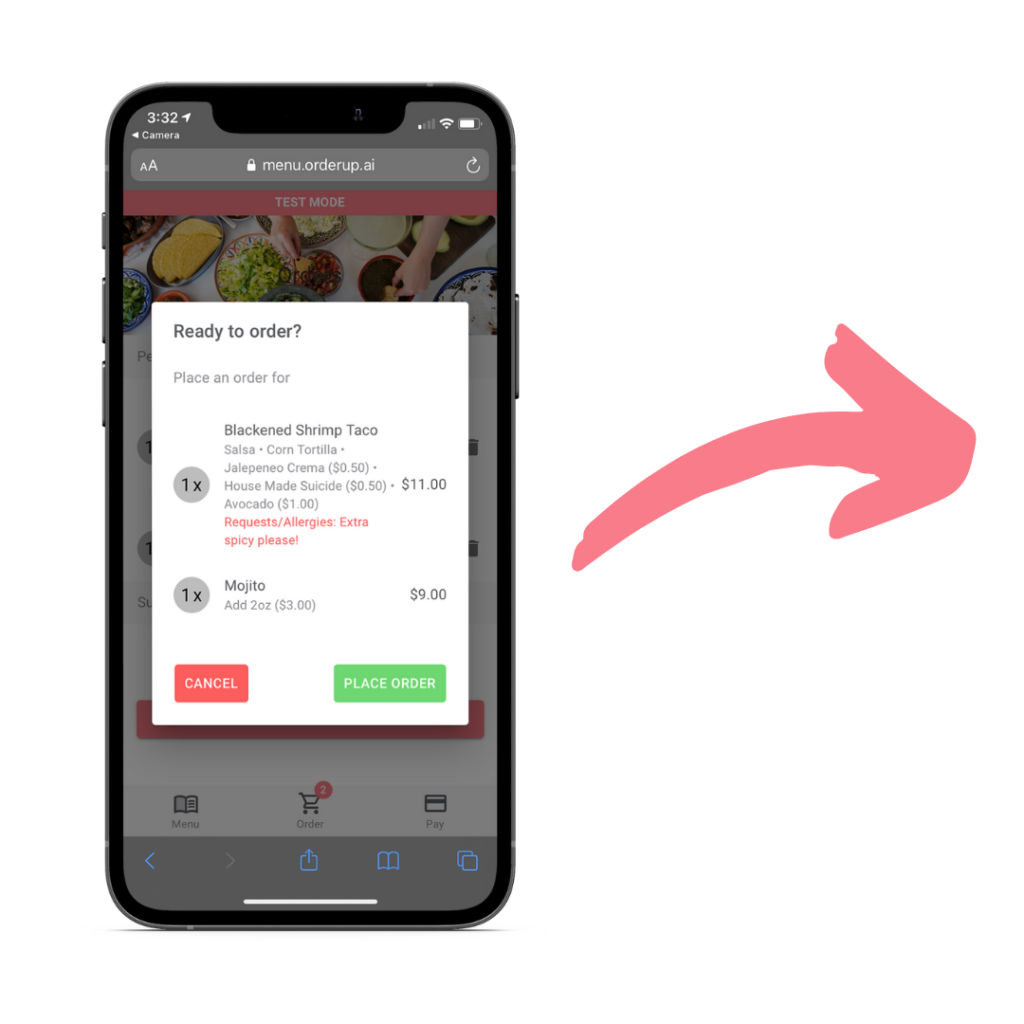
From the tab, guests can review and place their order. As soon as the order is placed, it will appear on your restaurant’s tablet or point of sale. There’s a flashing alert with a sound that won’t disappear until a member of staff interacts with the tablets.
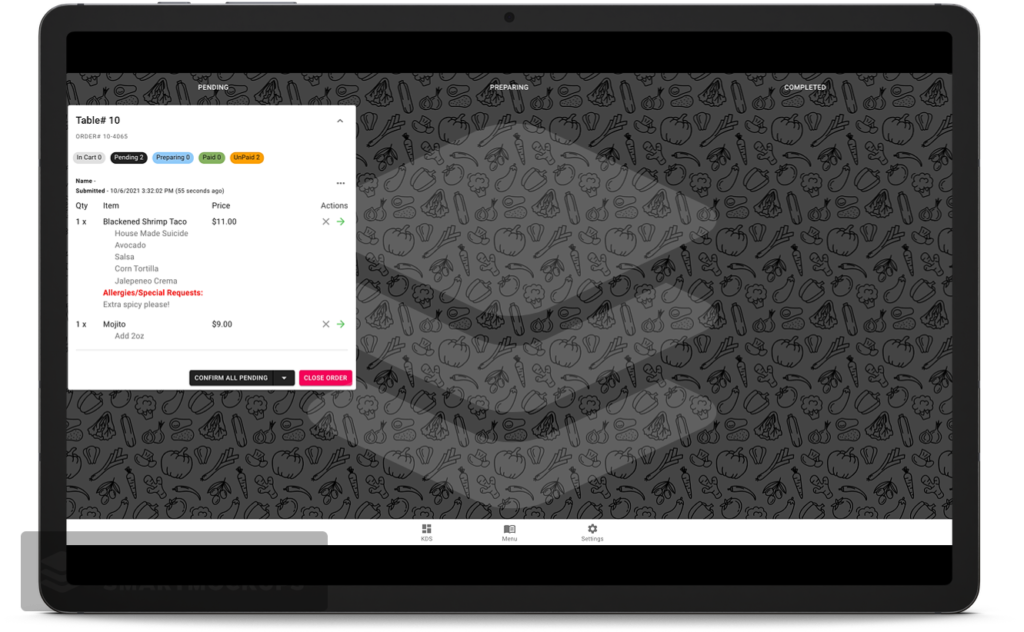
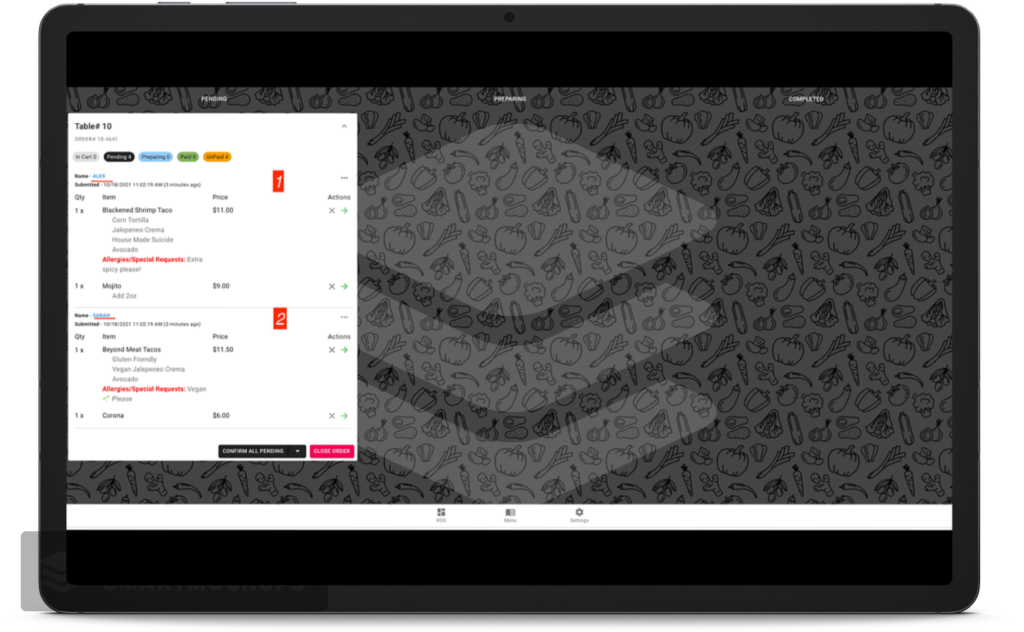
The order is displayed by Table Number & Guest Name & Time the order was placed. Multiple guests will show on each table’s ticket.
*In the image below, the tablet shows 2 guests have ordered at table #10*
Staff are able to accept single items at a time, or confirm all pending, controlling when items are sent to the kitchen & the flow of service.
WHAT IF I WANT ORDERS TO GO DIRECTLY TO THE KITCHEN?
You can set items to “auto confirm” if you wish – this will bypass the item appearing in the “Pending” column, and move it directly to “Preparing”.
That item/order will now automatically print to any assigned printer(s) at the kitchen and/or bar.
7.Confirming Order
Once the order is reviewed, a staff member can confirm all or some of the items. Once confirmed, the ticket will move to the next column & a chit will print to the appropriate kitchen or bar printer. All items will remain in this column or ticket until the guest has paid.
See the short video below:
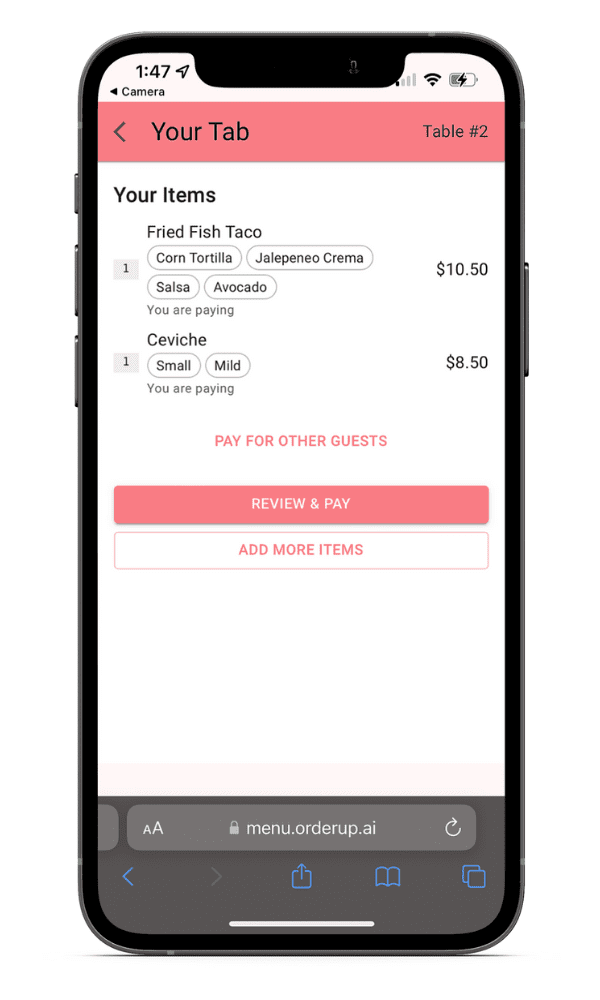
8. Review & Pay, or add to tab
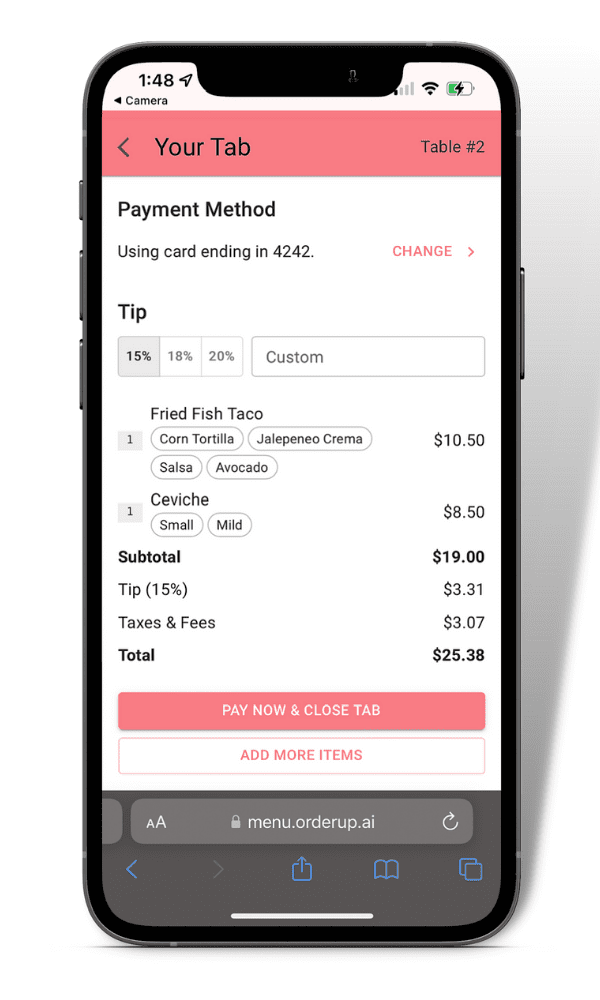
After the guests have submitted their order, they will have the chance to review their existing tab, and either pay right on the spot, or add more items.
There’s also the option to open a tab and skip the payment process completely.
9. Payment (From Guest)
Guests are able to pay whenever ready. Bills can be reviewed and paid by “Pay now & close tab”.
At this point, they will also be able to pay for others at the table by clicking “pay for other guests“.
We encourage guests to settle up before they switch tables to ensure the right items are going to the right people.
When and if guests scan a different QR Code at a different table, all of their information will auto-populate.
10. Payment (Merchant Side)
On the tablet, any order or item that is partially paid for will move into the Completed column. Partially paid tables will appear in Orange.
Fully paid tables will be removed from the OMI screen and appear in the Transactions tab.
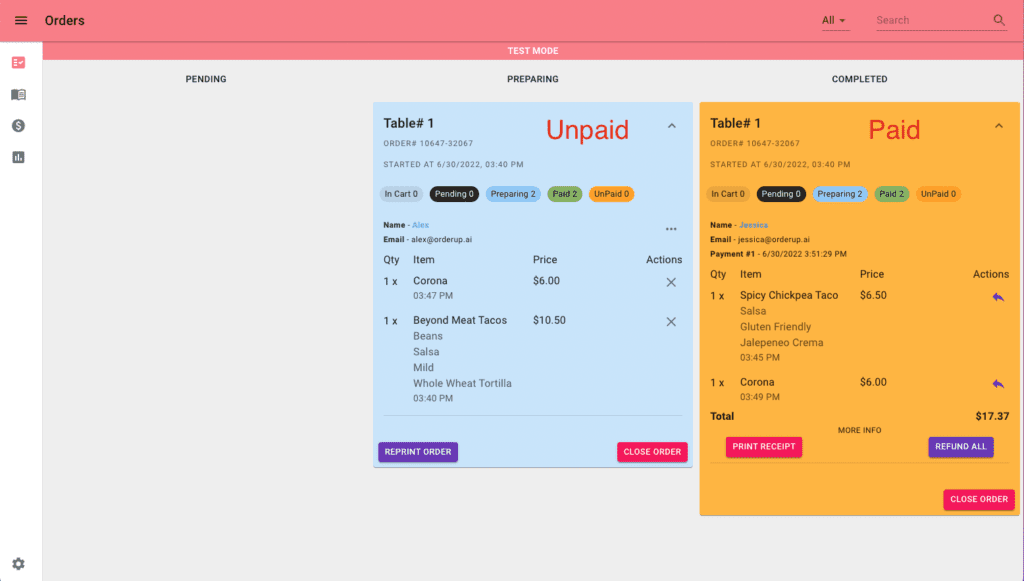
*Above: Partially paid table.
What If A Guest Wants to Pay by Cash?
In many cases, diners may rather settle up by cash, debit card or something else. In this case, we’ve added a “Pay External Cash” button. A staff member would manually enter the order into the existing POS, and cash the guest out. To reflect this in this OrderUp system:
1. Click the 3 dots to the right of the guests name
2. Click “Pay External Cash”
11. Extra Benefits
By empowering your diners to Order and Pay from their phones, it unlocks tons of benefits for your restaurant.
- Reduce overhead costs and reliance on FOH staff
- Test menu pricing , positioning, imagery and descriptions to optimize revenue
- Easily update menus in real-time
- Increase average guest cheque size by 20% (Find out why)
- Turn tables up to 15-minutes faster.
- Connecting with a younger demographic (hint – it’s Gen-Z)
- Drive repeat visits and customers with easy e-mail marketing
This is just the tip of the iceberg. In the coming years, this type of service and technology will become the norm. It unlocks amazing opportunities for restaurants, and improves the dining experience for your guests.

